How to Use Gmail to Send and Receive Email from Your Own Custom Business Email Address
We see many local businesses that list a Gmail email address on their website. For example, instead of using the email address [email protected], the website will list [email protected] as the contact email. We know that many business owners prefer using Gmail to check their email because it's easier to use and that it's free. However, we encourage that you create a business email address using your company's domain name (e.g. [email protected]) to appear more professional and established.
The good news is you can continue to use Gmail for your personalized business email, and below is a step by step guide on how to do this on your Gmail account.
In this example, we are using a domain that is registered at GoDaddy. The first step is to create your business email address on GoDaddy using your website address. To setup an email address on Godaddy, you have the option of creating one that simply forwards messages to other mailboxes, or setup a custom business email address by using free email credits or purchasing an email plan. To be able to send and receive emails on Gmail using your custom business email address, you would need an email address, not just setting up an email forwarding account.
Tutorial on setting up your business email address on Gmail
One you have set up the business email forwarding address, then follow our step-by-step guide on how to setup your Gmail account to send and receive emails from your business email address.
- Log into your Gmail account.
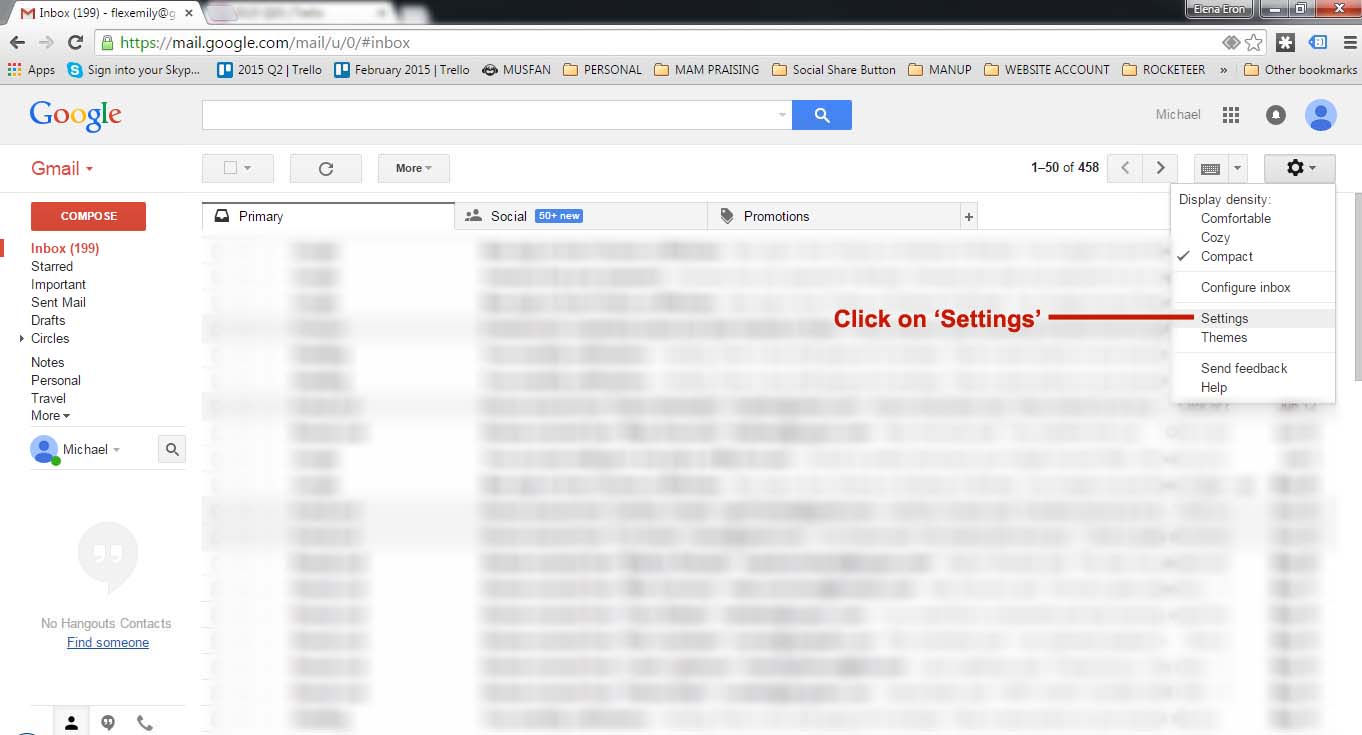
- Go to the Gear at the top right and select Settings.
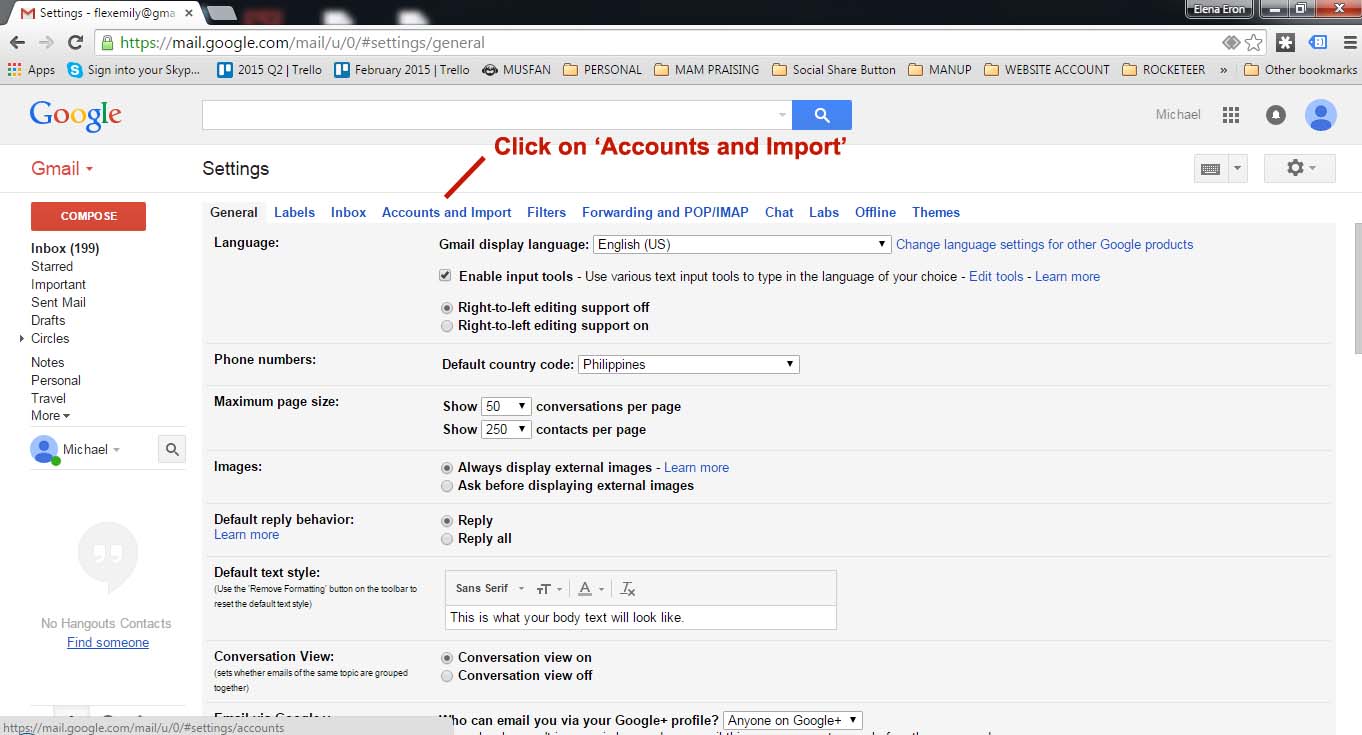
- Click on 'Accounts and Import' tab
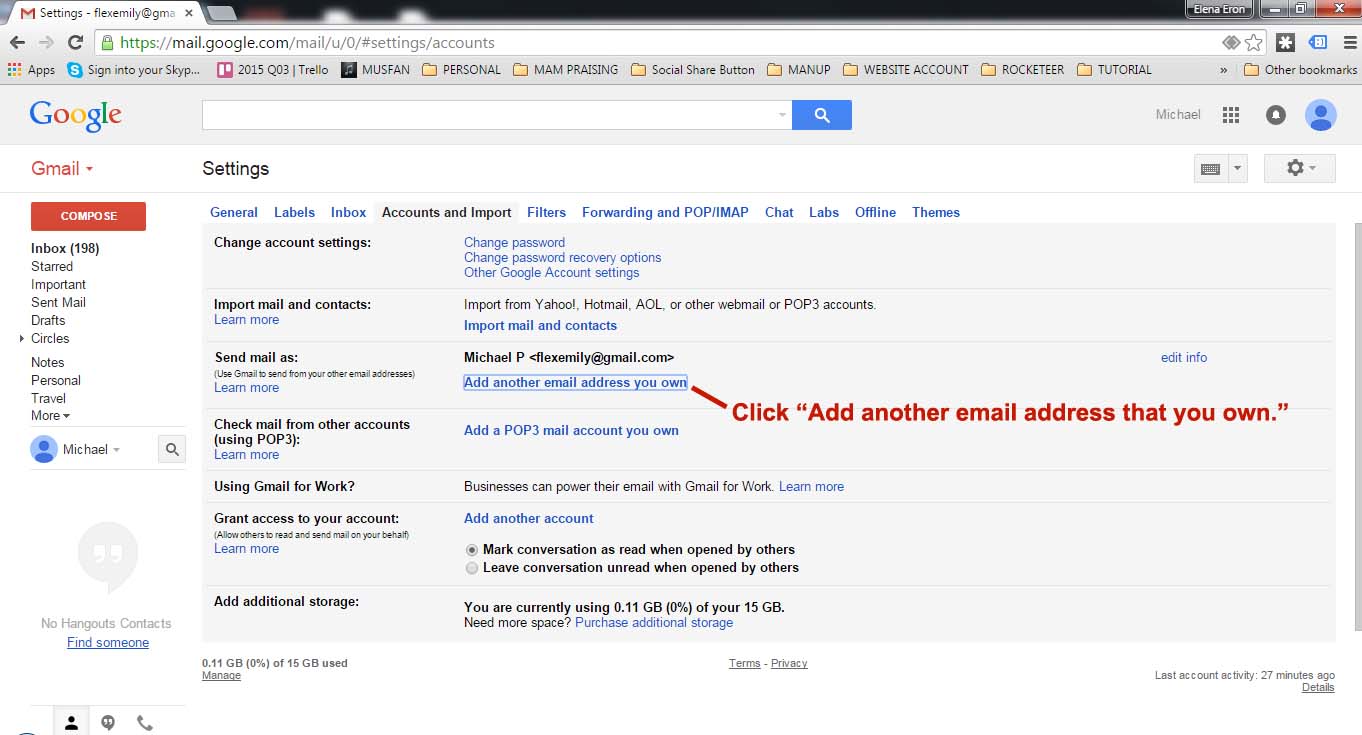
- On the Accounts and Import section of Settings, look at the "Send Mail As" section and click "Add another email address that you own".
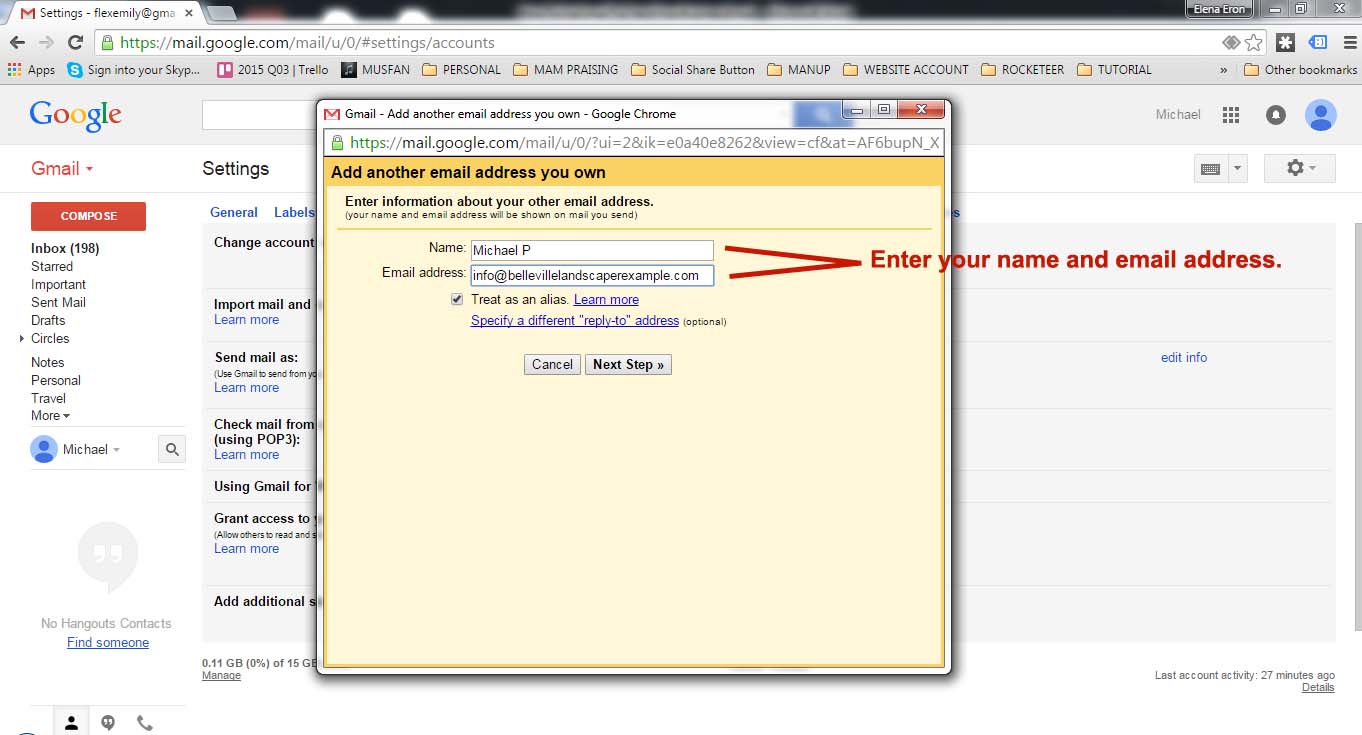
- Enter your name and email address and click Next Step.
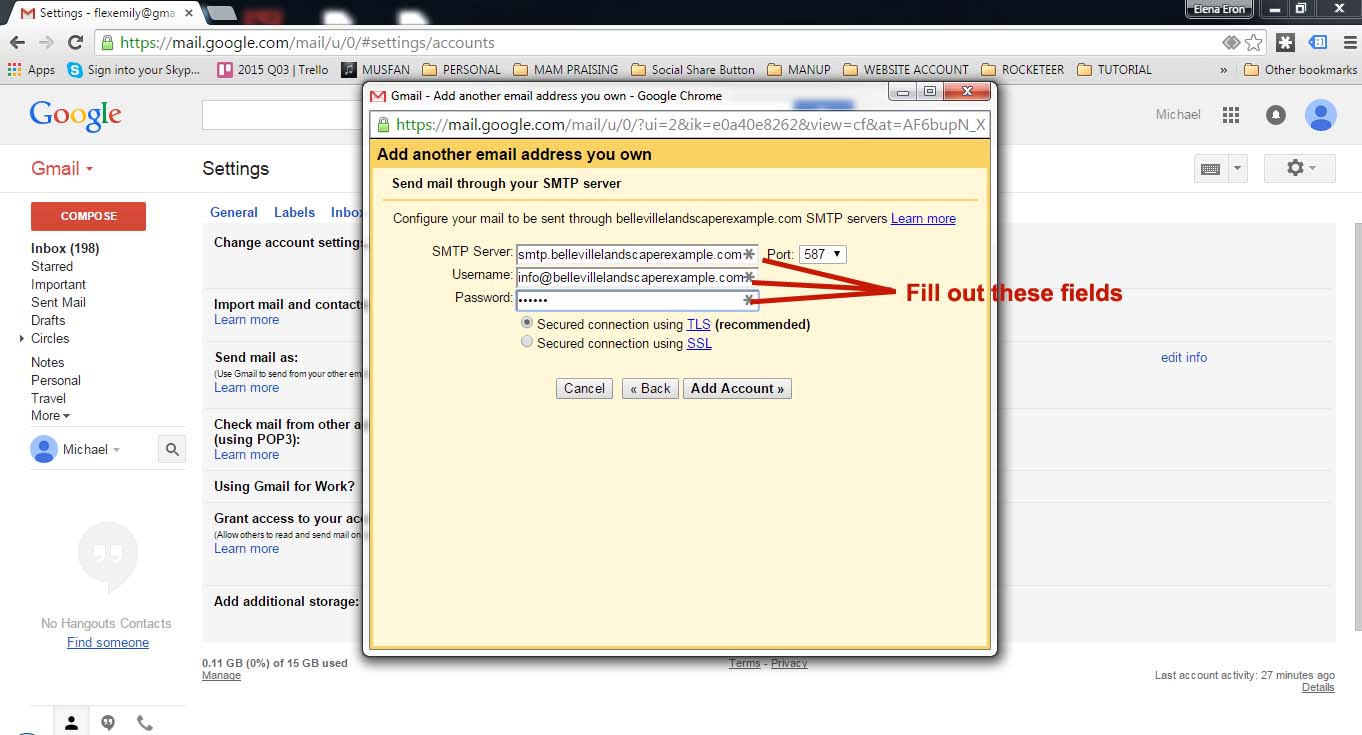
- Fill out the SMTP Server, Username and Password fields.You can find the required information from Godaddy (or your domain registrar, where you purchased your business domain). Then click 'Add Account'.
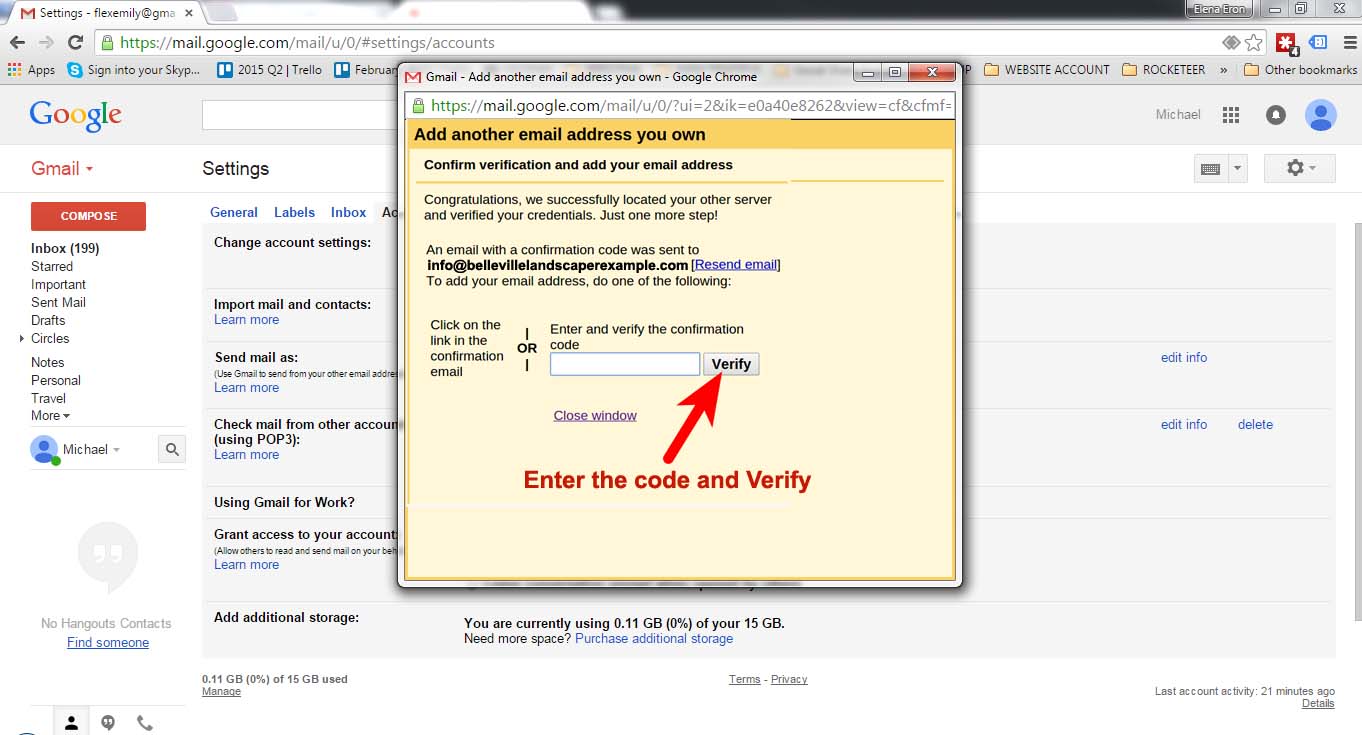
- You should receive an email confirmation to ensure that you actually do own the email address you're adding. Enter the code and Verify.
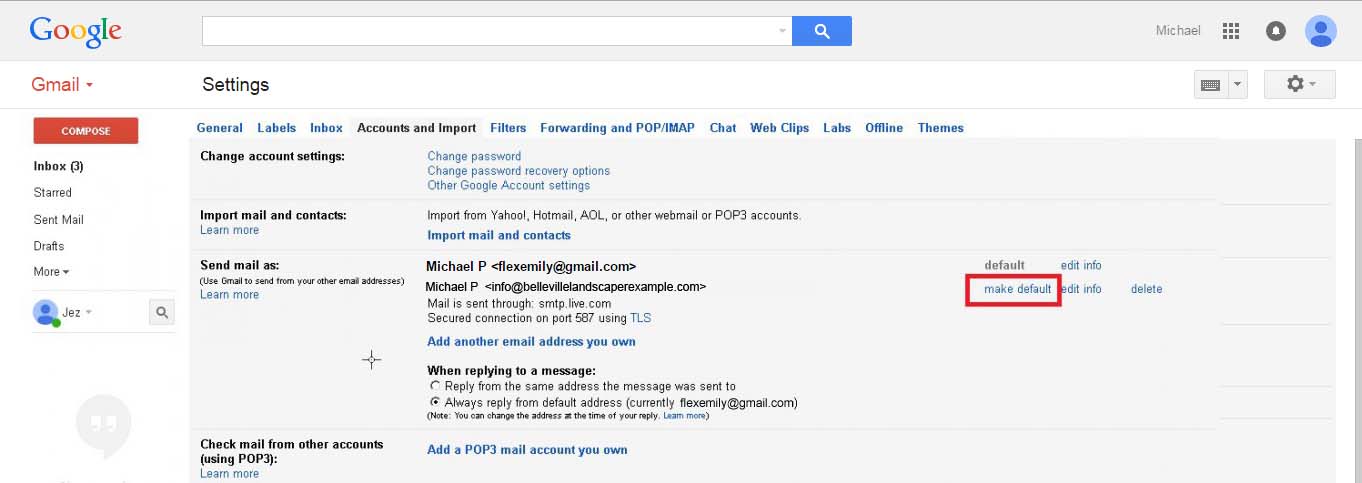
- Now you will see your Domains email address in the Send Email As and make it as Default.
Feel free to email us at [email protected] if you have any questions or need help in setting up a more professional looking email address for your business.

